

Termilino
Termilino documentation
From your first SSH connection to saved commands, local backups and Codex access.
Install and connect
Download the DMG, open it and drag Termilino to Applications. Eject the image and launch Termilino from Applications. macOS 13 or later is required.
- Choose New server. Enter the host, username and SSH port; the default port is 22.
- Choose a password or private-key file. Connect opens a one-time session; Save and connect also creates a bookmark.
- Compare the host-key fingerprint with a trusted source before accepting a new server. Enter any missing credentials in Termilino.
Workspace, tabs and windows
Servers, Authorizations and VPN share the left sidebar. Terminals, editors and Settings open in the center; saved commands live on the right. The View menu controls the sidebars, status bar and fullscreen.
Drag tabs to reorder them or move one to a separate window. A terminal tab can be duplicated; this starts an independent connection rather than copying a running process. Closing a tab ends that SSH channel.
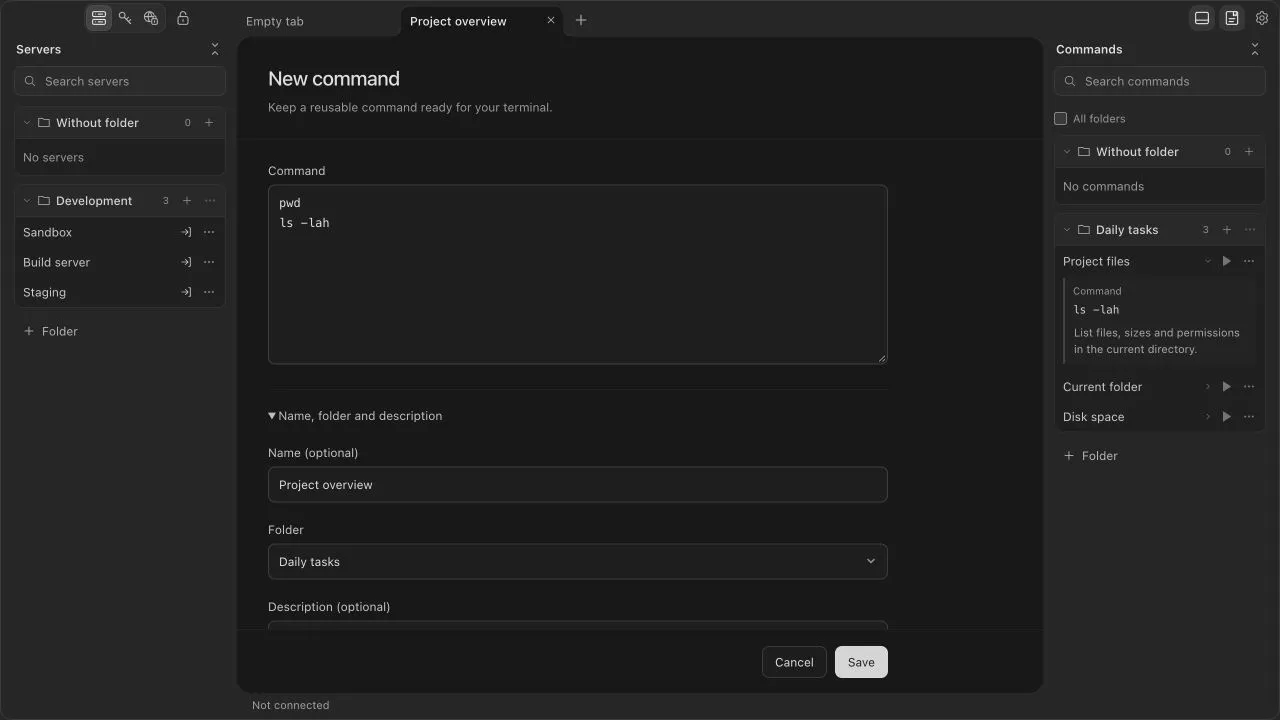
Server bookmarks and folders
Save an address, port, login method, name and folder together. Search filters the library. Drag bookmarks between folders or use their menus to reorder them. One bookmark can have several open sessions.
A bookmark can specify a starting directory, startup command and sudo behavior. Review these before connecting. Editing a bookmark changes future connections; an existing session keeps its original connection details.
Passwords, key files and Authorizations
Use an SSH password or an external private-key file, including a passphrase-protected key. Termilino reads a selected key file when needed; storing its path does not copy the file into a portable backup.
Authorizations stores reusable login records that several bookmarks can reference. Changes apply on the next login. For sudo, choose password reuse or a separate password where supported by the server.
Terminal and reconnection
Each session uses the remote server’s interactive shell. Host-key changes require review; rejected trust is not silently bypassed. Eligible connection losses trigger visible retries, with Retry and Cancel controls. Missing unsaved credentials must be entered again.
Reconnection can restore a known directory in supported sessions. It does not clone containers, multiplexers or nested shells, and does not replay a saved startup command during automatic recovery.
Saved commands
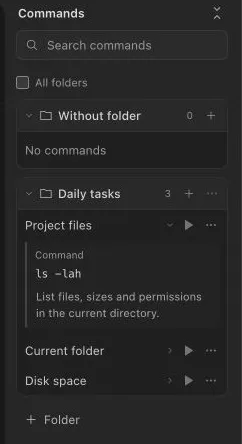
Create a command with its exact text, optional name and description. Click its name to expand the preview. Insert sends the text without adding Enter; Execute submits it to the active connected terminal. Inspect multiline commands before running them.
Command folders can be global or scoped to a server or server folder. All folders lets you manage other scopes. Local completion in the editor suggests command names and common subcommands; Tab accepts a suggestion and Escape dismisses it. Completion does not contact the server.
WireGuard connections
Import an existing one-peer WireGuard configuration from a .conf file or paste it in the VPN editor. Select the profile under Connect through VPN in a server bookmark. Check connection performs a handshake check; an SSH service must still be reachable separately.
The tunnel carries Termilino connections only and does not change system routes or DNS. The SSH destination must be a literal IP address covered by AllowedIPs. If the selected tunnel fails, Termilino does not silently fall back to a direct connection.
OpenAI Codex integration
Connect Codex from Settings > Codex, then explicitly share connected tabs for viewing or control. Codex uses the visible terminal without receiving stored SSH passwords or private keys through the integration. The separate Codex guide explains setup, pause, private mode, revocation and approved-command mode.
Codex guide ↗Vault, master password and lock
Saved passwords, key passphrases and VPN secrets are encrypted in a local vault. Set a master password in Settings > App lock to protect the vault key with Argon2id. Automatic unlock stores its device key alongside application data; copying the entire directory can also copy that key.
Lock applies to every window and blocks Codex access. Existing SSH sessions can continue receiving output. Touch ID is optional on supported Macs; the master password remains an unlock method. Keep your master and backup passwords safe.
Export, backup and restore
Settings > Backup & restore exports servers, commands and interface settings as JSON. Server exports exclude saved passwords and private-key file contents; command text and descriptions are plain text and may contain anything you entered. Review a file before sharing it.
A password-protected .termilino backup includes libraries, saved secrets, authorizations and VPN profiles. External private-key files must be transferred separately. For restoration, finish your work, leave one Settings-only window, review the backup preview and confirm replacement and restart.
Automatic encrypted checkpoints retain up to ten local copies within 64 MiB for supported recovery. They do not replace a separate backup against disk loss and do not save live terminals or unsaved drafts.
Language, fonts and shortcuts
Open Settings with the gear or Command-comma. The app interface offers System, English and Russian. Choose a terminal font and size from 8–40 px; changes apply to open terminals. Font license information is available in the font settings.
Tab-strip arrows, Home and End move between tabs. Use the tab context menu for window and Codex actions. Command-Shift-Escape pauses Codex input across shared tabs while Termilino is focused.
Application updates
Termilino checks updates.pwodev.com on launch and periodically. Settings > Updates and the app menu offer manual checks. Downloading an update does not install it automatically: the app verifies it and asks before restart. Finish or save your server work before installation.